RSET has been the primary focus of my professional career so far. When I joined the company in 2020, RSET was capable of ingesting a 3D scan from any source, and allowed users to walk around those scans with a 3D character. Since then, I have implemented many new features improving the explore mode, creating synthetic training, file sharing, VR integration, and even promotional games which are showcased in the following video. Above all, the most important thing I learned was how to make software that is easy to use by low-technically skilled individuals. RSET was initially designed to be simple enough for soldiers in the field to use it quickly and if they can play Call of Duty, then they will have no problem with RSET.
RSET: Training
The features I have developed the most in RSET are the various training modes RSET offers for first responders. Working on the various training modes of RSET taught me the importance of making realistic simulations, how to simplify customization through procedural generation, and AI behavior design.
Training in a 3D scan of a local building is more meaningful and crucial for first responders because if an incident should occur at one of the real locations, those trained in its digital twin will be more prepared to respond to the event due familiarity gained by training in it. From working with and receiving feedback from firefighters, paramedics, soldiers, and police we have learned that realism is the most important aspect of training as it is very hard to achieve cheaply. We always had this idea at the forefront of our mind when developing these features. It was also important to keep in mind that many trainees may not want to spend time curating a training exercise, which I resolved by including an option to randomly generate training scenarios with objectives that always spawn in realistic locations. This was no easy task considering training takes place in a 3D scan of a real world place that I have no information about when developing these features. Procedural generation rules have to be robust enough to handle any environment, which it does very well.
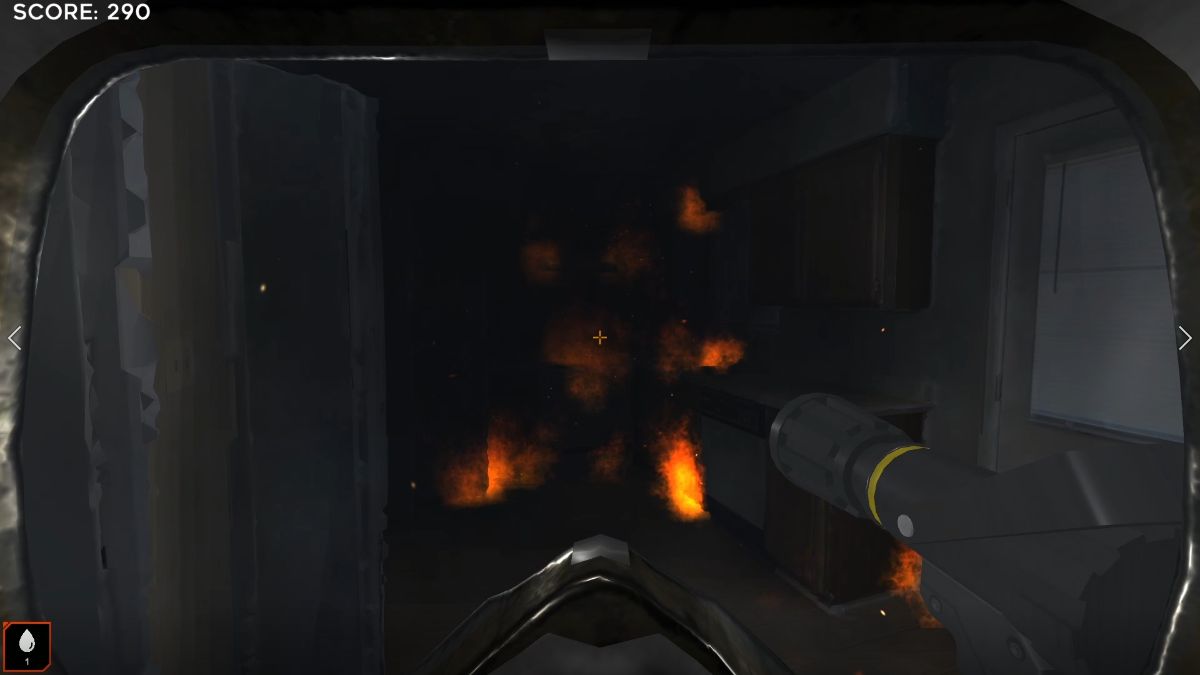
Thick smoke in RSET fire training
Firefighter Training - Creating Realism
At a glance, RSET’s firefighter training seems simple: aim hose at fire, extinguish. From a user perspective the simplicity is great, but there is a lot going on in the background to make the training as realistic as possible. Prior to training, users can select any object or surface in the environment and fine tune parameters such as flammability, extinguish difficulty, and what color smoke would burn from the object.
Then while in training, fire spreads using the IGNIS engine and over time the amount of smoke increases causing the player to reactively breathe more rapidly. Eventually, all the trainee can see is nothing but blackness with flames in the distance which is a sensation firefighters are far too familiar with.
Mass Casualty Training - Customization Simplified
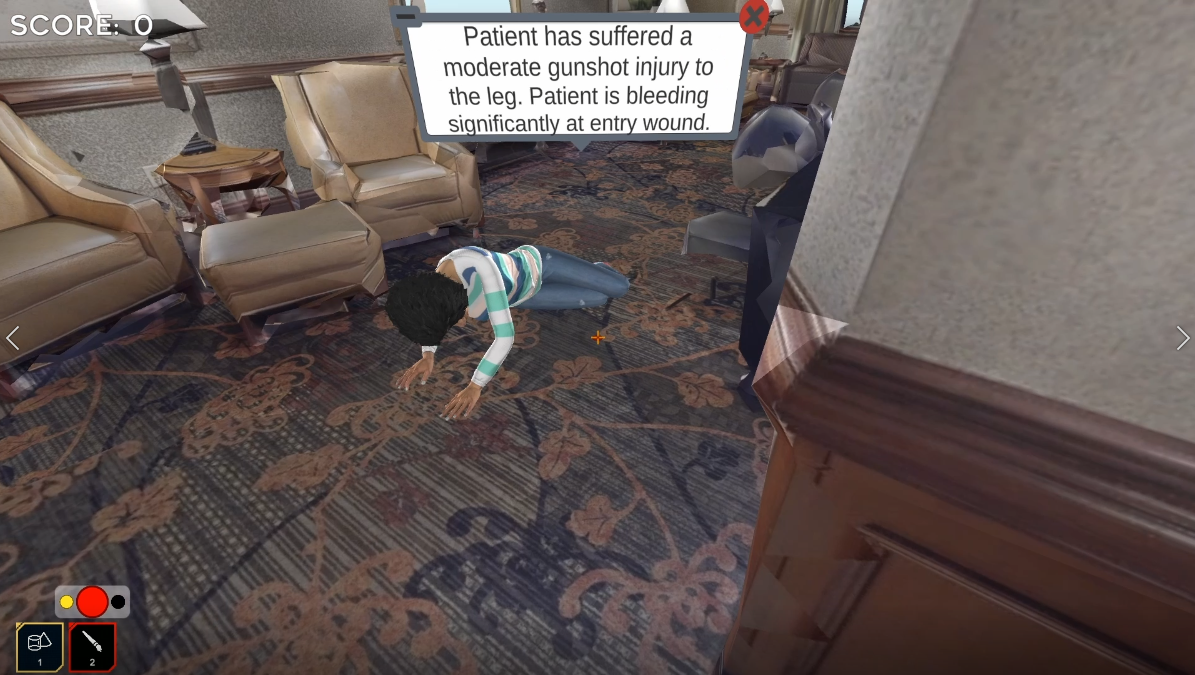
Good training for a high-risk event is unfortunately very expensive and is therefore not done frequently. RSET mass casualty training solves this problem by simulating a tragedy in any real world location. utilizing the existing paint tool to classify patients for triage and object tool to give patients quick treatments. Patients are easily configurable allowing users to select an type, location, and severity of an injury of a patient which will animate to display that specific injury. Training coordinators can then define the correct triage category and how the patient could be treated so when the trainee does the training there is a key to check their answers against. If the patients are randomly generated, the “answers” are set to the START (simple triage and rapid treatment) algorithm which is possible because the patients’ heart rate, respiratory rate, capillary refill rate, and more are determined by the injury. During training, trainees find patients using directional audio of their cries and will see a text description of the patient. On arrival users can take a patient’s vitals and see these values to inform their triage and treatment decisions.
Active Shooter Training - Working with AI
An event we are unfortunately familiar with here in the United States, but that just shows the importance of being able to train for these tragedies especially in 3D scans of public buildings such as schools. This training mode includes two AI agents: shooters and civilians. Shooters will search the environment for civilians and trainees to shoot at (prioritizing threats) and when injured will seek cover. Civilians will aimlessly walk around until a gunshot rings out or they can see the shooter at which point they will run for their lives, hide, and cower until the trainee saves the day. If too many civilians are killed, the training fails. Not only was this an incredible opportunity for AI pathfinding and behavior design, but solidified my skills in FPS game design and creating many NPC characters in a short amount of time.
The active shooter training started as our military training where all AI combatants were equipped with weapons and the purpose was to eliminate all targets. This mode included 2 other AI behaviors: a patrolling agent that walked aimlessly until the player was seen and a stationary agent that would hold a position and follow ambush the player.
RSET: Ecosystem
The RSET Ecosystem is a user friendly way of sharing 3D scans, curated training scenarios, and other 3D assets with other users in your organization. I was tasked with creating a database to store these assets, then use REST API to bring those assets into Unity. This feature taught me a lot about database design, SQL, user management, and user experience design.
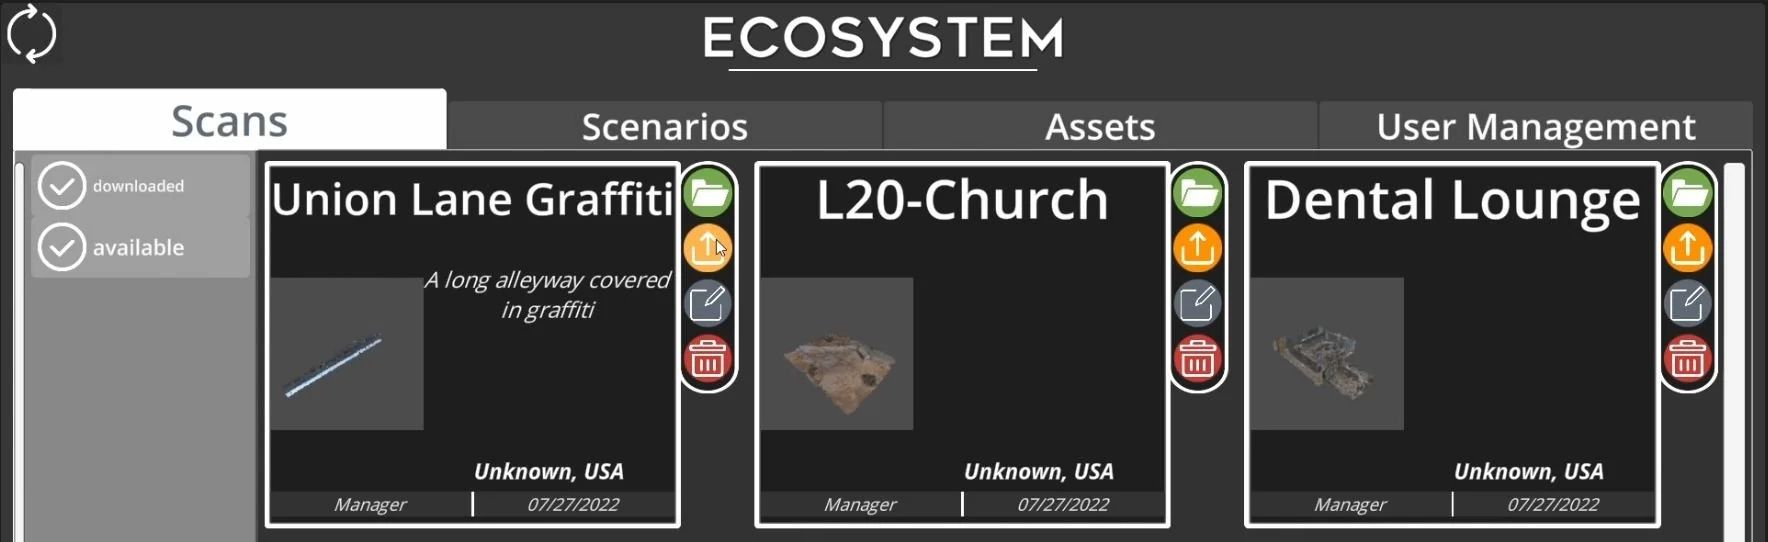
RSET Ecosystem UI
The ecosystem UX is very simple. Each item available to the user whether it be on the hard drive or the remote server are displayed in a grid. Each has 4 actions noted by logical icons: open the file, upload (or download), edit details, and delete. Each item has a preview of what the item looks as well as information about it so users know exactly what they are about to work with.
The other side of the ecosystem is user management. Each organization has an admin who can manage the org’s users and even assign them to sub-organizations and assign leaders. When a member of an organization creates a new asset, they can upload it to their organization where all other users in the organization will be able to download. If the organization has a parent, then the file can be submitted to the parent organization’s leader to approve to have it shared with all other sub organizations. The motivation for this feature was for a government department to be able to source training scenarios from their various stations. For example, each fire station would be a sub organization of the city’s fire department. If the captain of a fire station created a training scenario or scanned a building, that can be easily shared with all other users at the station, and sent to the fire chief for approval to send to all other stations in the city.
Creating the ecosystem was a great experience in understanding a user base and curating a tool to share files within potentially large organizations.
RSET: VR
When we showed RSET to clients, one of the most frequently asked features was if it would work in VR. So I did exactly that, but what is unique about RSET is VR is an option that can be accessed without having to restart the app and starting in a VR mode. This was necessary because the RSET designer would be too hard to use in VR - imagine trying to build a level in Unity but in VR only. Because this feature came after all our desktop training had been implemented, I had to think of the easiest way to replace our 3D character with a VR character. I am very proud of my approach because with some minor rework to the underlying mechanics, I was able to make subclasses of all scripts to work with VR mechanics.
The VR mechanics themselves are derived from the VRTK system which is a great free tool, but does have its limitations. For example, VRTK assumes all items you are going to interact with must be in the scene before play starts with inspector fields properly referenced… This doesn’t work for most games, but especially not for us where the whole point is for users to add their own objects. This became a lot of work to ensure all objects could be interacted with, all training objectives could be completed, and all tools worked properly when switched in and out. Another unique aspect about RSET too is how training modes are loaded. All scenes in RSET are actually the same, only different prefabs are added when launching training to add mechanics and the same was true for VR. This system allowed me to easily add new training modes, tools, and features without affecting others while preventing merge conflicts with my coworkers since the training modes are sandboxed.
Working with clients
RSET Inc is a small startup, meaning we all wore many hats which included meetings with clients trying to sell RSET and make money for the company. This is one of the more valuable skills I learned while working on the project because I was able to get experience in creating demos curated for specific audiences and made me think critically about business. I had to do research on competitors to influence RSET features and to inform pricing structures. Also, something that is certainly not taught in school is how to make connections, so I had to learn how to network by going to events and practice convincing people that RSET is a valuable product.
RSET: Explore
RSET’s exploration feature is its backbone and drives all the other training modes shown later. Before I joined the company, explore already had impressive features that I had to live up to such as: x-ray vision, dynamic object spawning, paint tool, measuring tool, and the ability to fly around as a drone rather than a humanoid. Each feature came with its challenges, but I rose above them every time and made products that I am extremely proud of.
Character Customization
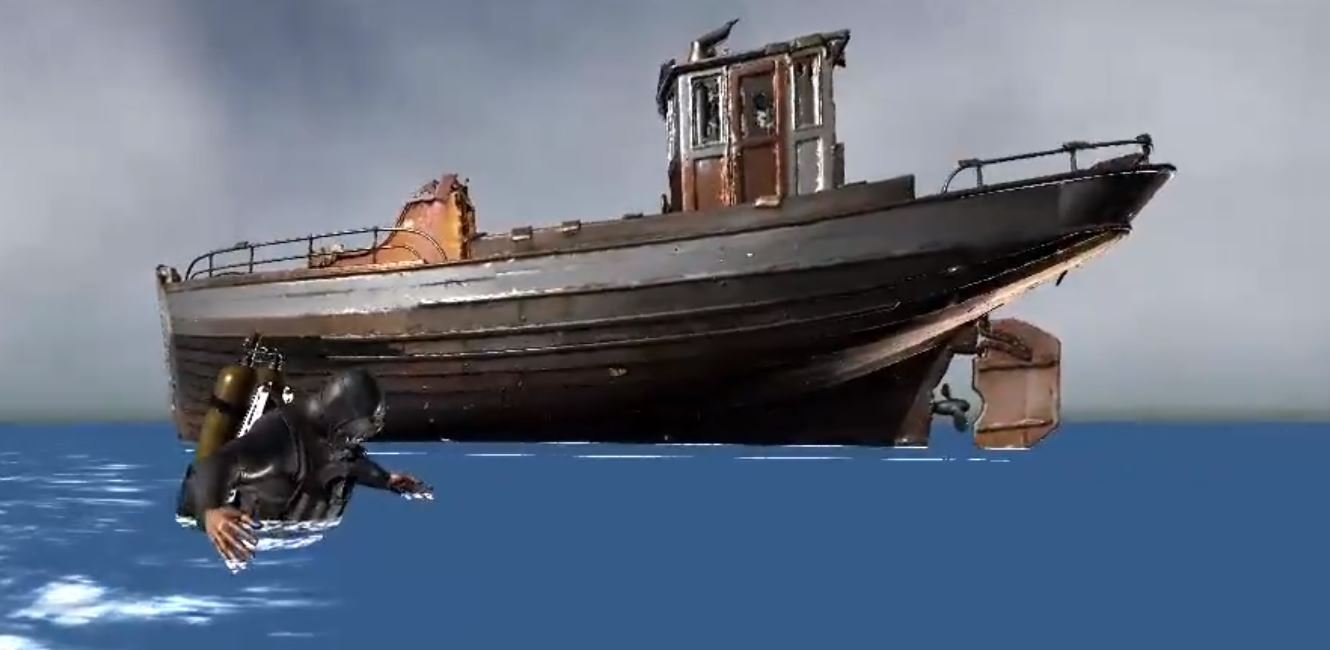
The first feature I implemented was the ability to change the appearance of the playable character’s avatar. Sounds simple enough but this involved a process of programatically rendering snapshots of each character that was available, and all customizable options such as their shirts, pants, etc. which were then put into a menu that had to scale to fit each option. This feature became very important later on by selecting a character that is relevant to the exercise. For example, if water is present the character becomes a diver, if the user is doing firefighter training the character becomes a firefighter, and so on.
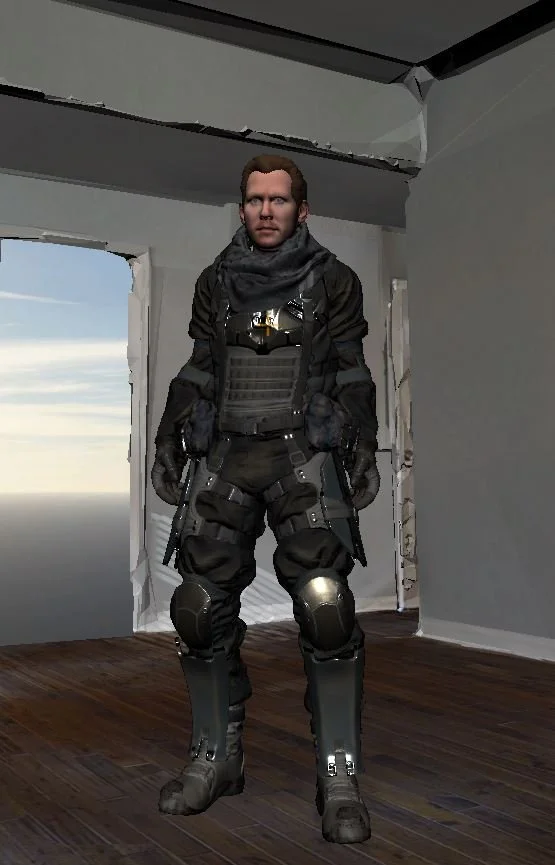
Customized character in RSET featuring a 3D model of my boss’ face.
Meta Movement
Even if you aren’t familiar with 3D scans, it isn’t hard to imagine that some places might be hard to reach or might require special movement to access such as ladders or narrow passageways. To fix this problem, I created easily modifiable zones that users can put in their scans using the designer feature to indicate where the player should perform a crawl, climb, or squeeze action to traverse the environment.
This feature also included the ability to completely submerge the scan in water then swim around in it. Turning any scan into a sunken adventure.
Camera Tool
An important aspect of training is the ability to evaluate your performance after the fact. I approached this by creating a camera tool that allows users to place multiple cameras in the designer feature. We ended up utilizing this feature to also align security cameras with their real world locations to recreate events filmed from the same perspective.